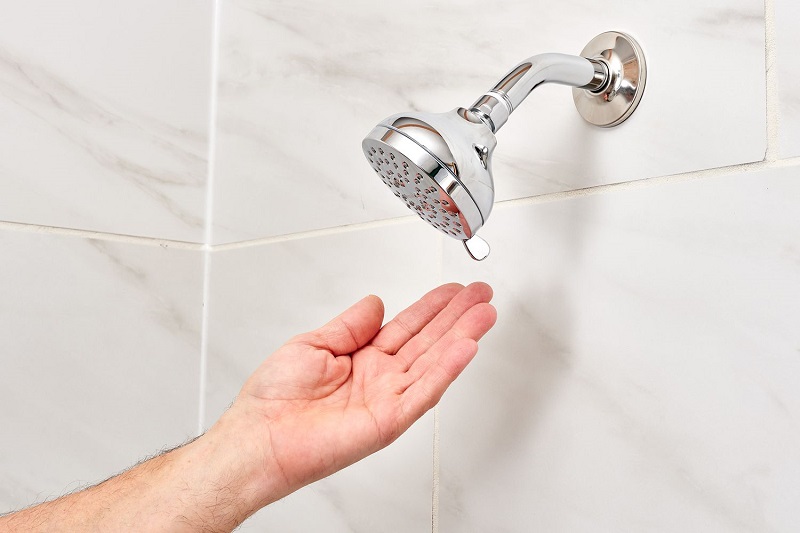
When it comes to creating a comfortable and rejuvenating bathing experience, a functional shower head plays a vital role. A refreshing shower can set the tone for the day or provide a relaxing retreat after a long day’s work. Whether you’re looking to upgrade your bathroom aesthetics or improve water pressure, installing a new shower head can make a noticeable difference. In this comprehensive guide, we’ll walk you through the process of installing a new shower head, from gathering the necessary tools to enjoying your refreshing new shower.
Gathering Your Tools and Materials
Before you embark on the journey of installing a new showerhead, it’s essential to gather all the necessary tools and materials. These items will help ensure a smooth installation process and a secure fit for your new shower head. Here’s what you’ll need:
Essential Tools You’ll Need
- Adjustable Wrench: This versatile tool will help you loosen and tighten various connections during the installation process.
- Plumbers Tape: Also known as Teflon tape, this tape is used to create a watertight seal between threaded connections, preventing leaks.
- Pliers: Pliers can be handy for gripping and turning different components as needed.
- Teflon Tape: This tape is crucial for preventing leaks and ensuring a secure connection between threaded pipes.
Selecting the Right Shower Head
Before you begin the installation process, take a moment to consider the type of showerhead you want. There are various options available, each offering a unique bathing experience. Some common types include:
- Fixed Mount: This classic shower head is affixed to the wall and provides a consistent water stream from a stationary position.
- Handheld Shower Head: With a flexible hose, this type of shower head offers versatility and convenience for targeted rinsing.
- Rainfall Shower Head: Designed to mimic the sensation of rainfall, this shower head provides a gentle and relaxing flow of water.
Preparing for Installation
Now that you have your tools ready and have chosen the right shower head, it’s time to prepare for installation. Follow these steps to ensure a successful installation:
- Turning Off the Water Supply: Before you start any plumbing project, it’s essential to turn off the water supply to the shower. This prevents accidental water leakage during the installation.
- Removing the Old Shower Head: Carefully unscrew the existing shower head from the threaded pipe. If it’s stubborn, you might need to use an adjustable wrench or pliers.
- Cleaning the Threaded Pipe: After removing the old shower head, clean the threaded pipe to ensure a smooth surface for the new installation.
- Applying Plumbers Tape: Wrap a few layers of plumbers tape around the threads of the pipe. This tape will help create a secure and watertight seal.
- Choosing the Right Placement: Determine the ideal height and angle for the new shower head. Consider factors like your height and shower preferences.
Installing Your New Shower Head: Step-by-Step
With the preparation complete, it’s time to start installing your new shower head. Follow these steps for a successful installation:
- Attaching the New Shower Arm (if needed): If your new shower head comes with a separate shower arm, attach it securely to the threaded pipe.
- Screw-On vs. Fixed Mount: Depending on the type of shower head you’ve chosen, either screw it onto the shower arm or fix it to the wall mount.
- Using Teflon Tape for a Watertight Seal: Apply a few layers of Teflon tape to the threads of the shower arm before attaching the shower head. This helps prevent leaks.
- Attaching the Shower Head: Carefully screw on the new shower head, ensuring a snug fit. You can hand-tighten it or use pliers for a slightly tighter connection.
- Checking for Leaks: Turn on the water supply and check for any leaks around the connections. If you notice leaks, tighten the connections further.
- Running a Quick Water Test: With the shower head attached, turn on the water to check the flow and ensure everything is working correctly.
- Addressing Any Issues: If you encounter any issues during the installation, such as leaks or improper water flow, review the steps and make necessary adjustments.
Exploring Additional Features
Modern shower heads often come with various features that can enhance your bathing experience. Consider these options for added functionality and comfort:
- Installing a Handheld Shower Head: If you enjoy versatility in your shower routine, consider installing a handheld shower head with a flexible hose for easy maneuverability.
- Using a Diverter Valve: A diverter valve allows you to switch between different shower heads or water outlets, giving you more control over your bathing experience.
- Mounting Options for Versatility: Some shower heads come with adjustable mounts, allowing you to change the angle and height as needed.
- Adding a Water Filter: Installing a water filter in-line with the shower head can help improve water quality by removing impurities and chlorine.
Troubleshooting and Tips
During the installation process, you might encounter some challenges. Here are some troubleshooting tips to help you overcome common issues:
- Dealing with Stubborn Old Shower Heads: If the old shower head is challenging to remove, apply penetrating oil to loosen it.
- Removing Mineral Deposits: Over time, mineral deposits can clog the shower head. Soak it in vinegar solution to dissolve the deposits.
- Fixing Leaks and Drips: If you notice leaks or drips, reapply plumbers tape and ensure all connections are properly tightened.
Maintenance and Care
To keep your newly installed shower head in top condition, follow these maintenance tips:
- Regular Cleaning to Prevent Clogs: Clean the shower head regularly to prevent clogs. Soaking it in a vinegar solution can help dissolve mineral buildup.
- Inspecting for Wear and Tear: Periodically check for any signs of wear and tear, such as rust or corrosion.
Exploring Design and Aesthetics
Upgrading your shower head isn’t just about functionality; it can also enhance the aesthetics of your bathroom. Consider these design options:
- Rainfall vs. Handheld vs. Dual: Choose a shower head that aligns with your preferred water flow and shower experience.
- Choosing Finishes that Match Your Bathroom: Opt for finishes that complement your bathroom’s decor and design.
Conclusion
Installing a new shower head is a rewarding DIY project that can transform your daily routine. By following these step-by-step instructions and considering additional features, you’ll be able to enjoy a more comfortable and enjoyable shower experience. Remember to keep up with regular maintenance to ensure your shower head continues to provide optimal performance. So, what are you waiting for? Get ready to indulge in a refreshing and rejuvenating shower experience like never before.
FAQs
How long does it take to install a new showerhead?
The installation process typically takes around 30 minutes to an hour, depending on your familiarity with plumbing tasks.
Can I install a new showerhead without using tools?
While it’s possible to hand-tighten some components, using tools like an adjustable wrench can ensure a more secure connection.
What’s the benefit of using a handheld showerhead?
A handheld shower head offers flexibility and convenience, allowing you to direct the water flow where you need it most.
Are water filters necessary for shower heads?
Water filters can help improve water quality by removing impurities, but whether they’re necessary depends on your water source.
Can I install an LED shower head myself?
Yes, you can install an LED shower head following similar installation steps. Ensure you follow the manufacturer’s instructions for electrical connections.


