Have problems with your garage door sensors? Don’t worry. You can quickly repair them with just a few tools and some know-how. Garage door sensors are a crucial safety feature that prevents the door from closing when something is blocking the path. Repairing faulty sensors ensures the door operates appropriately and avoids injuries or damage. Let’s dive into how to fix garage door sensors.
Understanding Garage Door Sensors
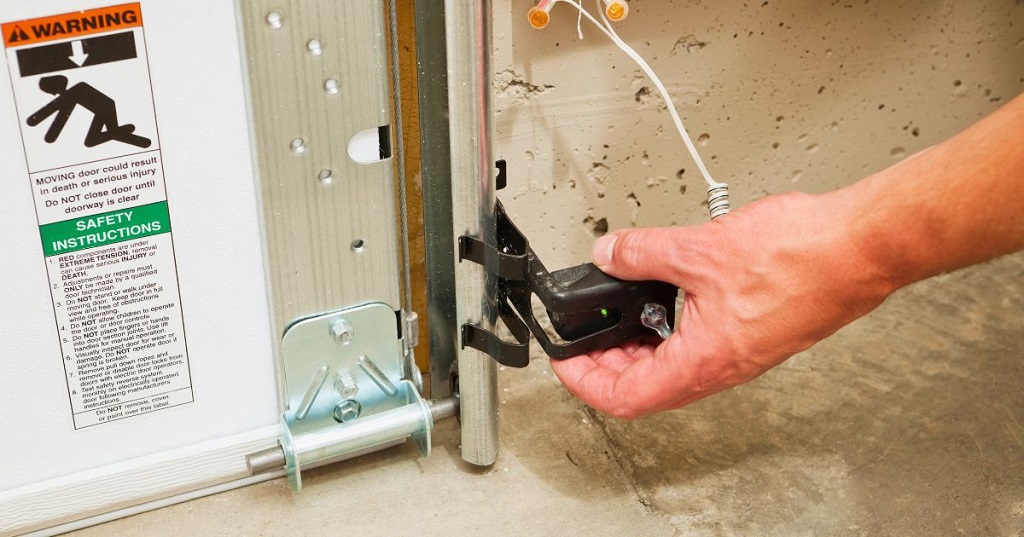
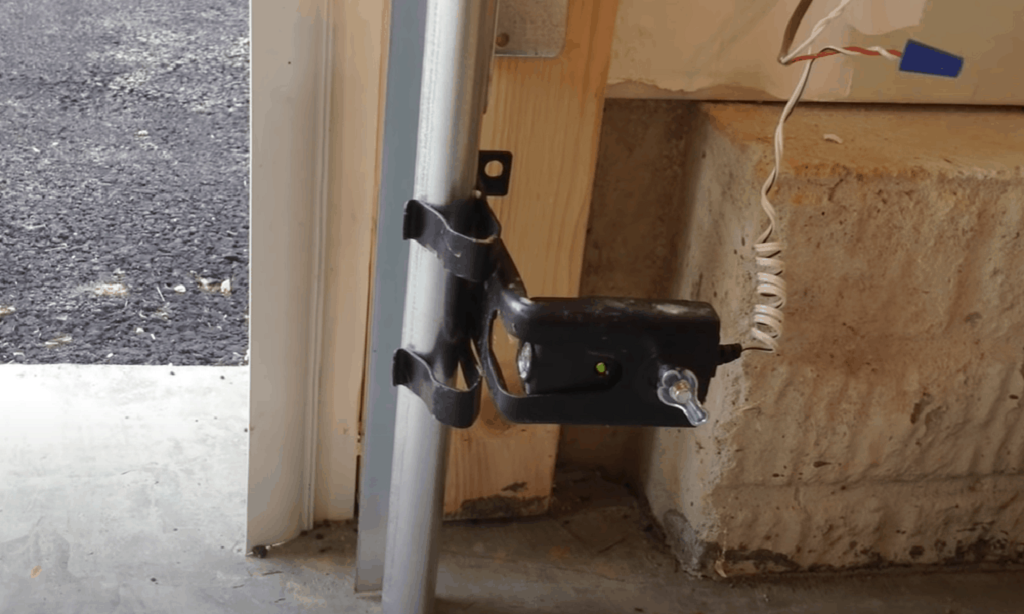
Garage door sensors, also called safety sensors or photo eyes, are located at the base of each side of the garage door opening. They work by emitting an invisible infrared beam across the doorway that signals the opener to stop and reverse if anything breaks the beam.
There are two types of sensors:
- Through-beam sensors – One sensor emits an infrared beam while the other receives it. If the beam is interrupted, it triggers the reversal mechanism.
- Retroreflective sensors – A single sensor emits and receives the infrared beam by bouncing it off a mirror on the opposite side. The beam disruption triggers reversal.
The sensors are connected to the garage door opener motor and control unit. If they are misaligned, dirty, or have electrical issues, it affects the functionality and safety.
Standard Garage Door Sensor Issues
Some common problems with garage door sensors include:
- Loose wiring connections – Vibrations from opening and closing can cause wires to become loose and disconnect. This interrupts the signal.
- Faulty alignment – If the sensors get bumped or knocked out of alignment, the beam path gets disrupted, causing intermittent functionality.
- Condensation or dirt buildup – Sensors can collect moisture or dust, which blocks the infrared beam. This prevents the signal from transmitting correctly.
- Bugs or cobwebs – Bugs swarming the sensors or cobwebs blocking them can obstruct the beam path.
- Burned-out light bulb – Most sensors have LED lights that indicate proper functioning. If the light dies, it needs a new bulb or unit.
- Electrical and mechanical issues – Problems with circuits, connectors, emitters, or receivers from normal wear and tear can stop sensors from working.
Diagnosing the specific problem will help you troubleshoot the repair.
How to Troubleshoot Garage Door Sensors
Before attempting repairs, troubleshoot the sensors first to identify any issues:
- Check the sensor LED lights – Activate the garage door and verify both sensor lights come on. Flashing or no lights indicate a connectivity, alignment, or power problem.
- Test the beam path – Run your hand across the beam. The receiver light should flash when obstructed. If not, the eyes are misaligned, or something is blocking the beam.
- Inspect for damage – Look for cracks, loose parts, frayed wires, or corrosion. Damage can interfere with connections and alignment.
- Check power connections – Ensure wires are securely connected to the sensors and opener. Loose wires are a common cause of issues.
- Check alignment – Sensors should point directly at each other across the door path without any obstructions.
- Clean the lenses – Use a soft cloth to wipe off condensation, dirt, cobwebs, or bugs blocking the lenses and reflector.
- Replace batteries – Most sensors have battery-powered emitters. Dead batteries will cause operational failure.
Thorough troubleshooting will reveal the likely cause of problems so you can target the repairs.
How to Repair Garage Door Sensors
Once you’ve diagnosed the specific problem, you can move on to making the necessary repairs:
Fixing Loose Wiring Connections
If sensors have become detached or wires are loose, simply reconnecting them can get your sensors functional again:
- Turn off the power to the garage door opener to avoid electric shocks.
- Check that the wire terminals are correctly seated in connectors on the back of the sensors. Refasten any loose wires.
- Ensure the wiring is also securely connected to the opener motor unit. Tighten any loose terminal screws.
- Check wires along the length for any detachments. Splice and reconnect wires using wire nuts if disconnected.
- Inspect wires for insulation damage or corroded copper. Replace any problem wiring.
- Restore power when all connections are secure. Test that the sensors are transmitting correctly.
Realigning Sensors
Misaligned sensors that don’t directly face each other will cause the door to malfunction:
- Begin realignment with the door fully closed to give a clear reference point.
- Check that the sensors are the same height off the floor, around 6 inches. Adjust mounts if necessary.
- Point both sensors inward to emit the beam directly at the other unit.
- Fine-tune the alignment by watching the receiver LED as you pass an obstruction through the beam path. The light should flash on and off.
- Securely tighten all sensor brackets and mounts when adequately aligned.
Cleaning Sensors
The buildup of dirt, dust, moisture, and cobwebs can all interrupt the infrared beam. Make sure the eyes stay clean:
- Wipe off sensor lenses using a microfiber cloth sprayed with a small amount of rubbing alcohol.
- Use compressed air to blow out any debris or insects around the lenses and reflector.
- If needed, check the reflector and realign it so the infrared beam hits its dead center.
- Overhead garage door tracks often accumulate grease and dirt. Clean them periodically to prevent grime from falling onto sensors.
Replacing Batteries
Battery-powered sensors will stop operating when energy runs low. Swapping in fresh batteries, restores function:
- Locate the battery cover on the transmitter module. It’s often on the sensor’s rear.
- Remove the cover and expired batteries. Common types are AA, AAA, or 2032 coin cells.
- Insert new batteries with the correct orientation. Pay attention to positive (+) and negative (-) terminals.
- Replace the battery cover securely. Press the transmitter button to test.
- Only use the battery type recommended by the manufacturer to avoid problems.
Fixing Electrical Issues
If cleaning and realignment don’t help, the internal electronics may have electrical problems:
- Inspect for any scorched, burned, or melted components or connections. This can indicate short-circuiting.
- Check for corroded or cracked circuit boards. Static charge and moisture damage electronics over time.
- Test wiring continuity using a multimeter. Replace any cords failing conductivity tests.
- Ensure all connectors are correctly mated with their ports and bent pins or detachments cause malfunctions.
- Tighten all mounting screws that may have vibrated loose over years of vibration.
- Call a professional for more complex component-level electronic repairs beyond DIY skills.
Replacing Defective Sensors
After cleaning, alignment adjustments, new batteries, and other repairs, sensors may still not work correctly due to defective components:
- Test irradiance of the emitter using a photosensor. Weak or no output indicates a faulty emitter.
- Check the receiver voltage getting to the control board. Little or no voltage likely means a misbehaving receiver.
- Misaligned sensors that won’t hold adjustments often have broken mounts or brackets.
- Units with cracked or damaged lenses, corroded circuits, and melted wires typically need total replacement.
- Purchase replacement sensors that exactly match your existing models to ensure compatibility.
- Swap in the new units and reconnect all wiring. Program if needed and test for proper functionality.
With the proper repairs, your garage door sensors will operate smoothly and safely again. Contact a garage door technician for complex diagnostics or repairs.
Tips for Maintaining Garage Door Sensors
To maximize the lifespan of your sensors and prevent unnecessary repairs, follow these maintenance tips:
- Periodically clean lenses with a microfiber cloth to remove dust and grit that can interfere with the infrared beam.
- Spray away cobwebs and bugs near the sensors using compressed air to clear the beam path.
- Ensure sensors remain correctly aligned. Check their positioning if the door starts acting up.
- Oil the garage door tracks so grease doesn’t splatter onto the lenses as the door opens and closes.
- Check wire connections to make sure vibrations haven’t loosened any over time.
- Test the sensors monthly by obstructing the beam path while operating the door. The opener should reverse when interrupted.
- Replace batteries regularly, even if they are still working, to avoid sudden failures at inopportune times.
- Update old sensor models to modern contactless versions with fewer alignment and cleaning issues.
- Avoid spraying cleaner directly on sensors, as liquids can damage the internals. Use damp cloths instead.
With periodic inspection, cleaning, and maintenance, garage door sensors will function reliably for many years before needing repair.
FAQs
What if the sensor lights won’t come on at all?
Non-illuminating sensor lights usually indicate a complete power failure. Check that the sensors are wired correctly and that the batteries are fresh. The wires may be disconnected, or the opener circuit board may be defective.
Why does the door reverse for no reason?
Unexpected reversing is often due to misaligned sensors with an obstructed beam path. A hanging branch or warped sensing unit can sporadically interrupt the beam and trigger reversing.
Why won’t the door close even when nothing is blocking the sensors?
Dirty lenses could prevent proper beam transmission if the door doesn’t close without obstructions. Alignment may also be off. Inspect and clean the sensors thoroughly to troubleshoot the cause.
Can I use generic replacement sensors?
Generic sensors might not sync properly with your opener. Use OEM replacement parts designed for your specific model to ensure full compatibility.
How do I program new sensors?
Most modern replacement sensors automatically sync once installed. Some older models require programming by simultaneously holding down “learn” buttons on the motor unit and sensors until indicator lights activate.
Conclusion
With a basic understanding of how to repair garage door sensor, you can handle many sensor repairs yourself. Troubleshooting problems accurately is crucial before attempting DIY fixes. Ensuring the safe and efficient operation of your garage door involves more than just spring replacement; it’s crucial to keep sensors clean, aligned, and properly connected. Replace defective parts promptly to maintain functionality and guarantee the security of your DIY garage door spring replacement. Consider pro assistance for complex wiring diagnostics or electronic component level repairs.