Hey there, DIY enthusiasts! Have you ever been in a situation where you’re trying to open or close your window, and that darn window crank just won’t budge? Don’t worry; you’re not alone. Window cranks can be a real pain when they decide to give up on you. But fear not! In this ultimate guide, we’re going to show you how to replace a window crank step by step, making it as easy as pie.
Why should you replace a window crank?
Before we dive into the nitty-gritty of replacing a window crank, let’s talk about why you might need to do this in the first place. Window cranks can wear out over time due to constant use and exposure to the elements. They can become stiff, loose, or even break altogether. When this happens, it can be frustrating, and it can also affect the functionality of your window. So, replacing that old, worn-out crank can not only make your life easier but also improve the overall look and operation of your window.
Tools and Materials You’ll Need:
Before we get started, let’s gather all the tools and materials you’ll need to replace your window crank. Here’s a handy list:
New Window Crank: Make sure you have the correct replacement crank for your window. You can find these at hardware stores or online.
Screwdriver: You’ll need a flat-head or Phillips-head screwdriver, depending on your window’s hardware.
Pliers: These will come in handy for removing stubborn old cranks or retaining clips.
Putty Knife: For prying off any covers or trim pieces around the crank.
Replacement Screws: In case your old screws are damaged or stripped.
Safety Gear: Safety first, folks! Grab some safety glasses and gloves to protect your eyes and hands.
Now that you’ve got your tools and materials ready, let’s get down to business.
Step 1: Identify Your Window Type
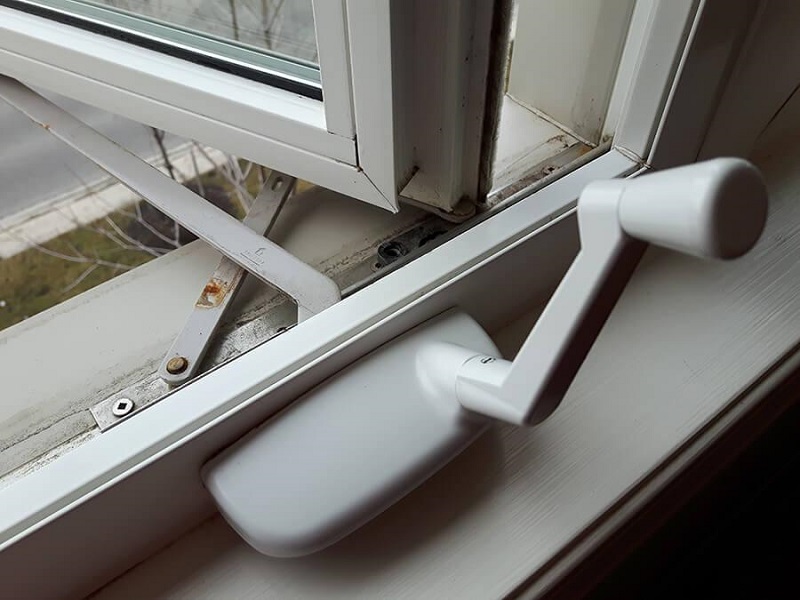
Before you can replace the window crank, you need to identify the type of window you have. Different types of windows have different crank mechanisms. The two most common types are casement windows and awning windows.
Casement Windows: These are windows that swing open like a door, hinged on one side. The crank mechanism is typically located on one of the window’s sides.
Awning Windows: Awning windows open from the bottom, tilting outward. The crank mechanism is usually located at the bottom.
Take a good look at your window to determine which type you have. Knowing this will help you find and access the crank mechanism more easily.
Step 2: Remove Any Trim or Coverings
Now that you know your window type, it’s time to remove any trim or coverings that may be hiding the window crank. Sometimes, there might be a cover or decorative piece that conceals the mechanism. Use a putty knife or a flat-head screwdriver to gently pry off these coverings.
Remember, be patient and gentle. You don’t want to damage the trim or coverings in the process. They may be reusable once you’ve replaced the crank.
Step 3: Access the Window Crank Mechanism
With the trim or covering removed, you should now be able to see the window crank mechanism. It’s usually secured with screws. Use your screwdriver to carefully remove these screws. Make sure to keep the screws in a safe place; you’ll need them later.
As you remove the screws, be prepared for the window crank to come loose. If it doesn’t, don’t force it. Use pliers to gently help remove the crank if necessary.
Step 4: Disconnect the Old Window Crank
Now that the screws are out and the window crank is loose, it’s time to disconnect it from the window. There may be a retaining clip holding the crank in place. Use your pliers to carefully remove this clip.
Once the retaining clip is off, the old window crank should easily come away from the window. If the crank is damaged or broken, this is the time to completely remove it.
Step 5: Install the New Window Crank
With the old crank out of the way, it’s time to install the new one. Place the new crank in the same position where the old one was. If there was a retaining clip, make sure to reattach it securely. The clip helps keep the crank in place and ensures smooth operation.
Step 6: Secure the New Crank
Now that your new window crank is in place, it’s time to secure it. Use the screws you removed earlier to attach the crank to the window frame. Make sure the screws are snug but not overly tight, as you don’t want to strip the screw holes.
Step 7: Test the Window Crank
Before you put everything back together, give your new window crank a test run. Turn the crank to open and close the window a few times to make sure it operates smoothly. If you encounter any resistance or unusual sounds, double-check your installation and make adjustments as needed.
Step 8: Replace Trim or Coverings
If you removed any trim or coverings in Step 2, now’s the time to put them back in place. Gently press them back onto the window frame or use a mallet to secure them if needed. Make sure everything looks tidy and matches the rest of your window.
Step 9: Clean Up
Congratulations, you’ve successfully replaced your window crank! Now, all that’s left to do is clean up. Dispose of any old parts, screws, or packaging responsibly. Give your window a good wipe-down to remove any fingerprints or smudges.
Step 10: Enjoy Your Smooth-Operating Window
With your new window crank in place, you can now enjoy the effortless operation of your window. No more struggling or frustration—it’s as smooth as butter.
Now that you know how to replace a window crank like a pro, let’s address some common questions you might have.
FAQs
- How do I know if my window crank needs replacing?
If your window crank is difficult to turn, makes grinding or squeaking noises, or if it’s visibly damaged or broken, it’s time for a replacement. Even if it’s just stiff and not working smoothly, replacing it can make a world of difference in the long run.
- Can I use any window crank as a replacement?
No, you can’t use just any window crank as a replacement. Window cranks come in various sizes and styles, so it’s essential to find one that matches your window type and the specific model of your window. Measure your old crank and ensure you get a replacement with the same dimensions and style.
- Do I need to hire a professional for this job?
While it’s possible to replace a window crank yourself, it does require some basic tools and DIY skills. If you’re comfortable with simple home repairs and have the necessary tools, you can certainly do it yourself. However, if you’re unsure or uncomfortable, it’s always a good idea to consult a professional to avoid any potential damage.
- How often should I replace my window cranks?
The lifespan of a window crank can vary depending on usage and exposure to the elements. On average, you might expect to replace them every 10 to 15 years. However, regular maintenance, such as lubricating the crank mechanism, can extend their lifespan.