Soldering copper pipes is an essential skill for anyone working on plumbing projects, whether you’re a DIY enthusiast or a professional plumber. While it may sound daunting, the process is actually quite simple once you understand the necessary steps and tools involved. In this comprehensive guide, we’ll break down everything you need to know about how to solder copper pipes—from preparation to the actual soldering process, and even tips for achieving perfect joints. If you’re looking for quality tools, be sure to explore Bestusatools for all your plumbing needs.
Understanding the Basics of Soldering Copper Pipe
Soldering is a technique that involves joining two copper pipes using a filler material (solder) and heat. It creates a strong and watertight connection, which is crucial for plumbing systems. The primary components for soldering copper pipes are the copper pipe, a heat source (such as a blowtorch), flux, and solder.
Why Solder Copper Pipe?
Copper is the most common material used in plumbing due to its durability, corrosion resistance, and ease of use. However, joining copper pipes requires precision, which is where soldering comes into play. Soldering ensures that the joint is sealed tightly, preventing leaks and maintaining the integrity of your plumbing system.
Tools You’ll Need for Soldering Copper Pipe
Before starting the process, you need to gather the right tools. Having the correct equipment will make the job quicker, easier, and more reliable. Here are the tools you’ll need:
- Blowtorch: A heat source is essential for melting the solder. You can use a handheld propane torch.
- Flux: This material helps clean the copper and prevents oxidation during the heating process, ensuring the solder adheres properly.
- Solder: The filler metal used to seal the pipe. Lead-free solder is commonly used for potable water systems.
- Pipe Cutter: A good quality pipe cutter, such as a Craftsman Pipe Cutter, helps you achieve precise and clean cuts, which are essential for a good solder joint.
- Sandpaper or Wire Brush: These are used to clean the ends of the copper pipe before soldering.
- Heat Shield: Protect surrounding materials from the torch’s heat, especially if you’re working in tight spaces.
- Clamps or Pipe Supports: To keep the pipes in place while you work.
Step-by-Step Guide to Solder Copper Pipe
Now that you have your tools ready, let’s dive into the actual process of soldering copper pipes.
Step 1: Prepare the Pipe and Fittings
Before you begin soldering, you must first clean both the ends of the copper pipes and the fittings that will be joined. Any dirt, oil, or oxidation can prevent the solder from bonding properly. Here’s how to prepare:
- Cut the Copper Pipe: Use a pipe cutter to make clean, straight cuts on the copper pipe. A Craftsman pipe cutter is ideal for this job as it provides a smooth and accurate cut.
- Deburr the Edges: After cutting, use a deburring tool or sandpaper to smooth the edges of the pipe, removing any sharp burrs that could affect the fit of the joint.
- Clean the Pipe: Use sandpaper or a wire brush to remove any oxidation on the pipe’s surface. Make sure the pipe is shiny and free of dirt.
- Clean the Fitting: Also clean the inside of the fitting using a wire brush. This ensures a strong, clean joint.
Step 2: Apply Flux
Flux is a critical component in the soldering process. It helps to clean and prevent oxidation on the surfaces being joined, allowing the solder to flow smoothly and create a strong bond.
- Apply Flux to the Pipe: Use a brush to apply a thin, even layer of flux to the outside of the pipe where it will connect to the fitting.
- Apply Flux to the Fitting: Similarly, coat the inside of the fitting with flux.
Step 3: Fit the Pipe and Fitting Together
Now that the flux is applied, it’s time to fit the pipe into the fitting. Push the pipe into the fitting until it’s fully inserted. You may want to give it a slight twist to ensure the flux is evenly distributed.
Step 4: Heat the Joint
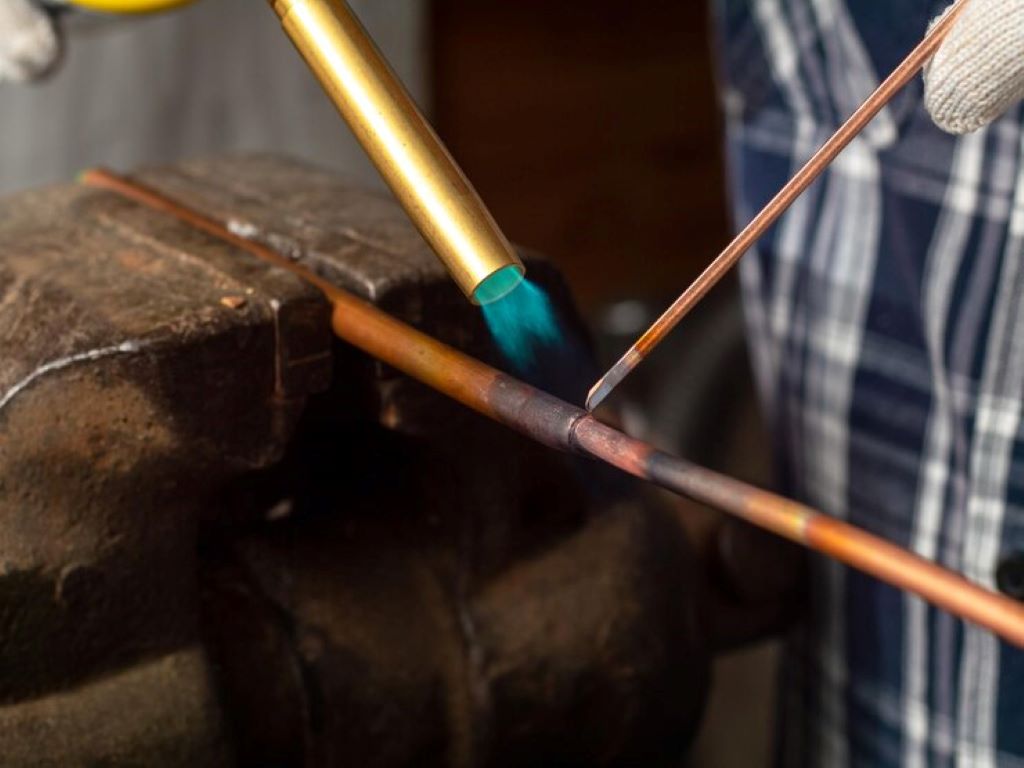
Using your blowtorch, heat the joint evenly. Move the flame around the fitting and pipe to ensure that the heat is distributed evenly. It’s important to avoid overheating the area, which could cause damage to the pipe or fitting.
- Watch for the Right Temperature: The ideal temperature is when the copper turns a dull red color, indicating that it is hot enough to melt the solder. You do not need to have an open flame on the joint itself—just heating the copper properly is sufficient.
- Test the Heat: If you’re unsure, you can test the heat by touching the tip of the solder to the joint. If it melts and flows into the joint, you’re at the right temperature.
Step 5: Apply Solder
Once the joint is heated, take your solder wire and apply it directly to the joint. The solder should melt and flow into the space between the pipe and the fitting. Move around the joint to ensure an even seal.
- Let the Solder Flow: Be patient and allow the solder to flow into the gap. You may need to add more solder to fully fill the joint.
- Do Not Overload: Avoid using excess solder, as it can create a mess and potentially block water flow. A small, even bead around the joint is all you need.
Step 6: Let It Cool and Clean Up
Once the solder has flowed into the joint, remove the heat source and allow the pipe to cool. It’s important to let it cool naturally—don’t rush this process by using water or fans to speed it up.
Once cooled, use a cloth to wipe away any excess flux. Flux can be corrosive, so make sure to clean it thoroughly.
Tips for Perfect Soldering Joints
- Don’t Overheat: Overheating can cause damage to the pipe and fittings, and can also make the solder flow unevenly.
- Use Lead-Free Solder: When working on potable water systems, always use lead-free solder for safety.
- Check for Leaks: After installation, check your joints for leaks by running water through the pipes and inspecting for any signs of moisture around the joint.
- Practice on Scrap Pieces: If you’re new to soldering, practice on scrap pieces of pipe before working on your actual project.
Common Mistakes to Avoid
- Not Cleaning the Pipes Properly: Dirt, oil, and oxidation can prevent the solder from bonding, causing leaks.
- Overheating the Pipe: Too much heat can cause the pipe to warp or even burn, ruining the joint.
- Not Using Enough Flux: Flux helps the solder adhere, so be sure to apply enough to the pipe and fitting.
Conclusion
Soldering copper pipes is a skill that can be mastered with practice and the right tools. Following the steps outlined above, you can achieve strong, durable, and leak-proof joints for your plumbing projects. Make sure you have all the right tools on hand, including a good pipe cutter and always take your time to clean and prepare your materials properly. With patience and attention to detail, you’ll be able to tackle any copper pipe soldering project with confidence.


